Production schedule
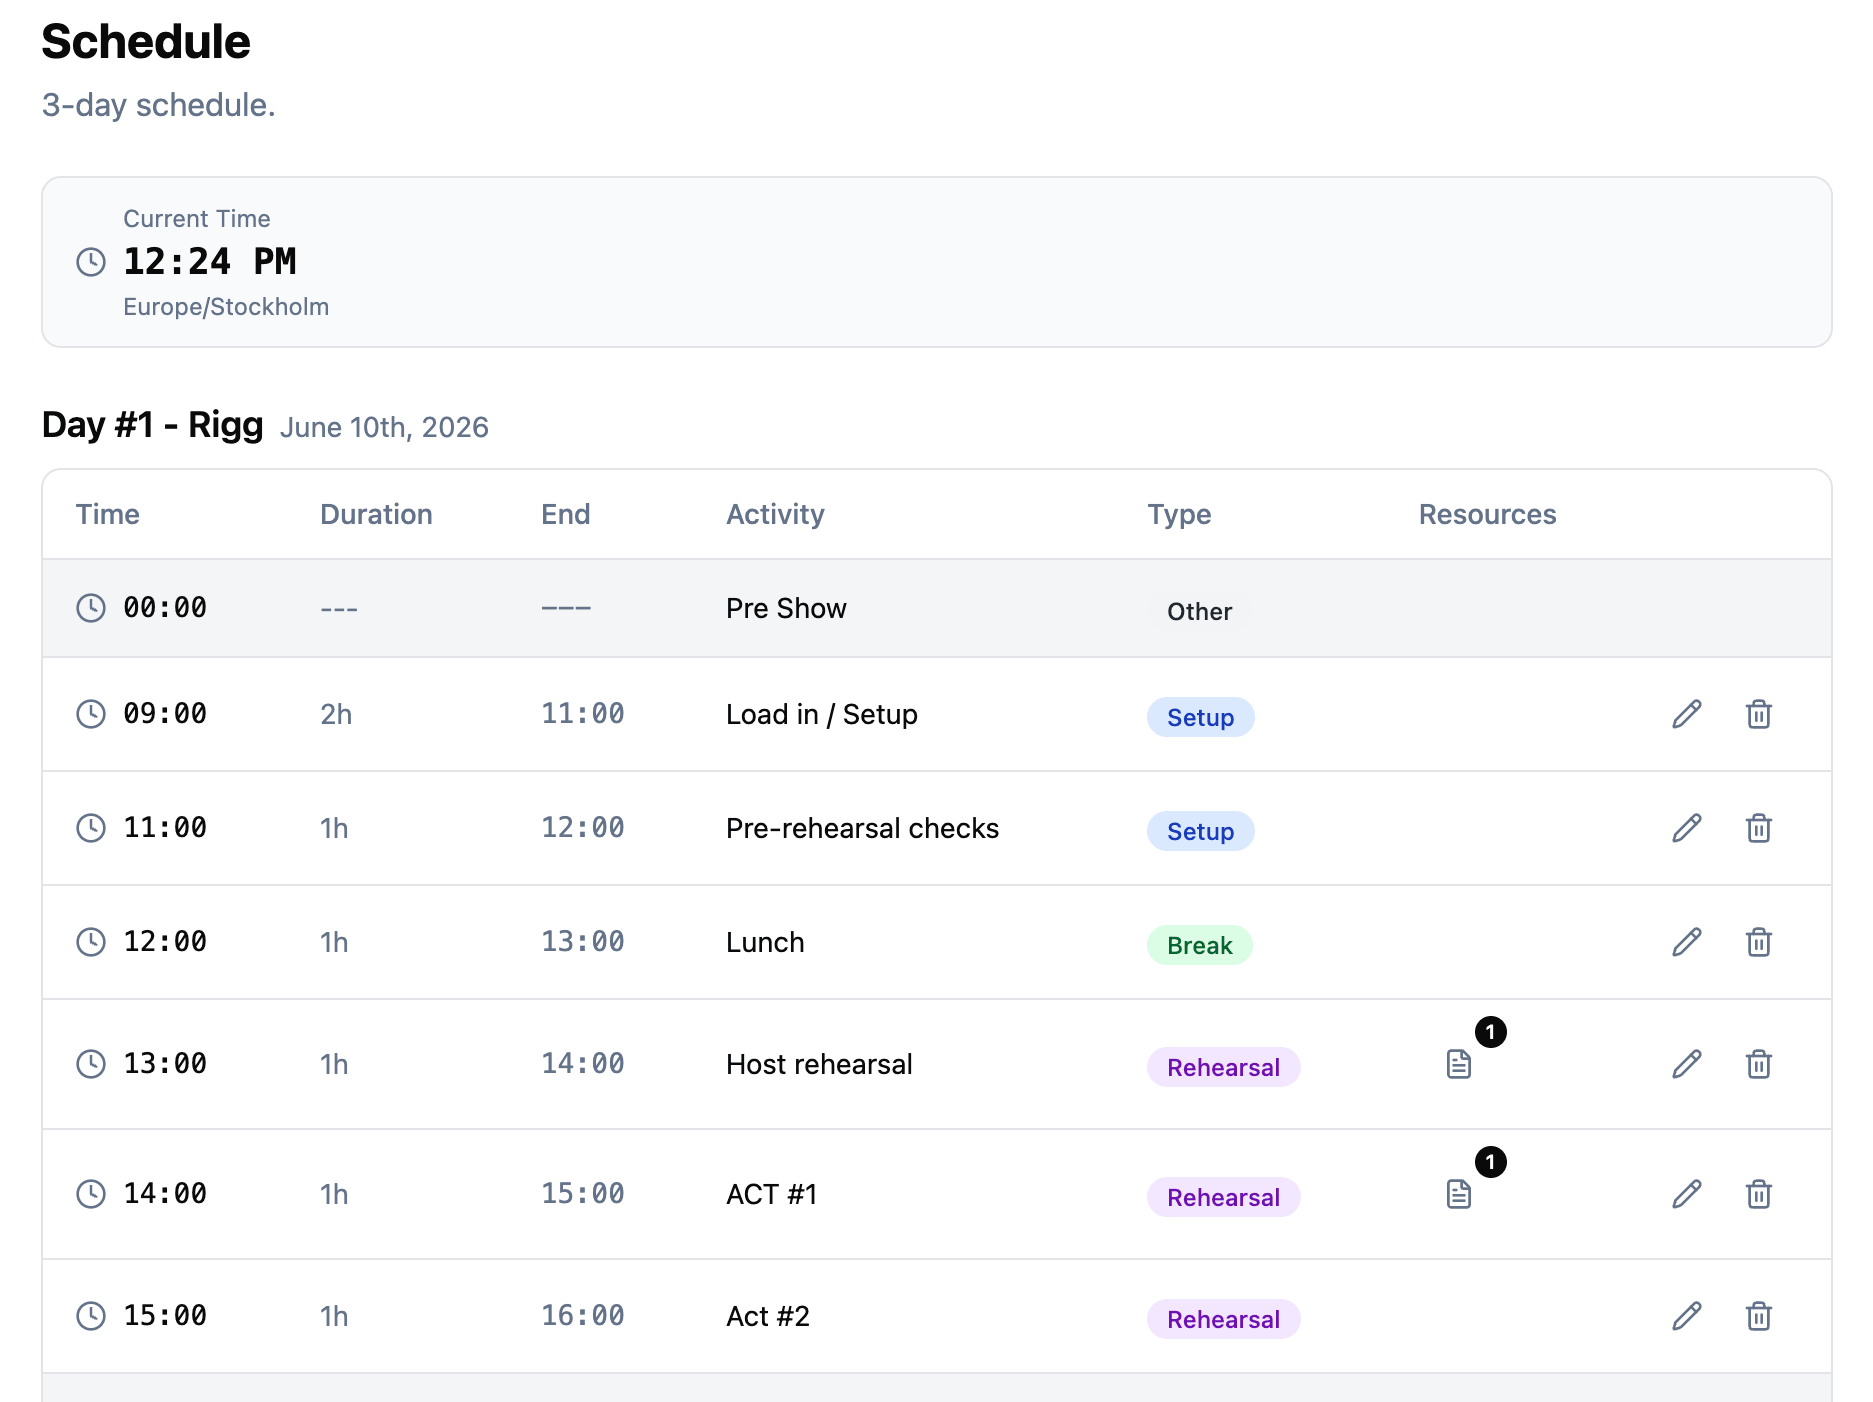
The production schedule is the timeline for your project. Each date in your project gets its own schedule, and each schedule is made up of timed items that represent what happens and when.
Schedules are timezone-aware. All times are displayed in the project timezone, and a live current-time indicator on the current day helps your team always know where they are in the schedule.
Schedule items
Each schedule item has the following properties:
- Activity name describing what happens during this time.
- Start time in HH:mm format (e.g., 09:00, 14:30).
- Duration in minutes. The end time is calculated automatically.
- Type that categorizes the item (see below).
- Team members assigned to the item (see below).
- Linked resources such as files or links relevant to that part of the schedule.
Items are automatically sorted by start time so the schedule always reads top to bottom in chronological order.
Editing items in place
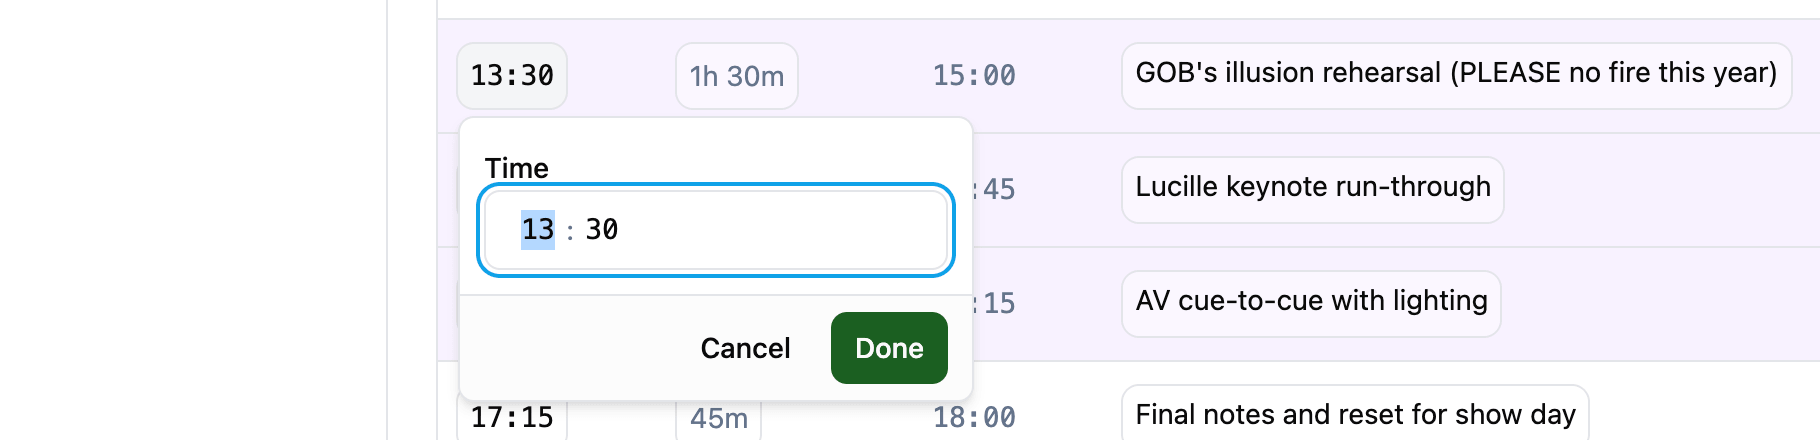
You can edit schedule items directly in the table without opening a dialog. Click a time, a title, a type, or a duration to change it in place. This makes it quick to iterate on a run of show without losing your place in the schedule.
Inline editors support keyboard shortcuts so you can keep your hands on the keyboard while iterating:
- Enter submits the current value and closes the popover.
- Escape cancels and closes the popover without saving.
- In the activity field, Cmd/Ctrl + Enter submits, since plain Enter is reserved for inserting a newline.
Gaps and overlaps
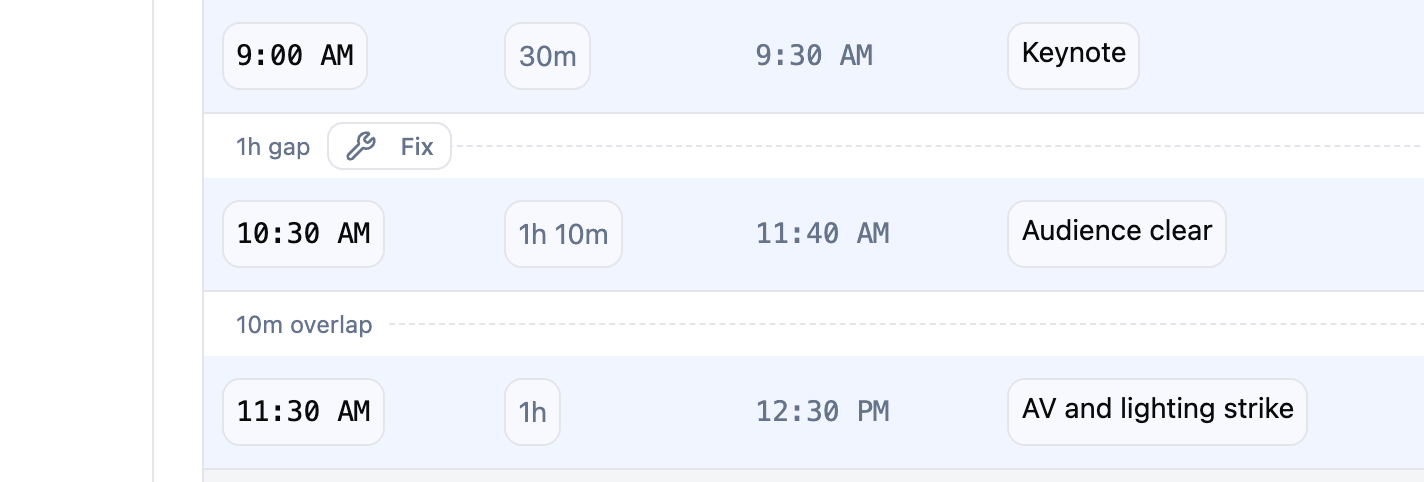
The schedule highlights time gaps and overlaps between consecutive items so you can spot accidental holes in the day or double-bookings without doing the math.
- Gaps show as a dashed line between rows with a label like “1h gap”.
- Overlaps show as a dashed line with a label like “10m overlap”.
- Zero-gap transitions — where one item ends at exactly the moment the next begins — show no indicator.
Indicators appear between all adjacent rows, including the bookend rows (Pre Show through to the first item, and the last item through to End of Day). Breakout blocks are treated as a single time block based on the group leader’s time and duration, so a breakout with multiple tracks doesn’t generate false overlap warnings against itself.
Fix: one-click resolution
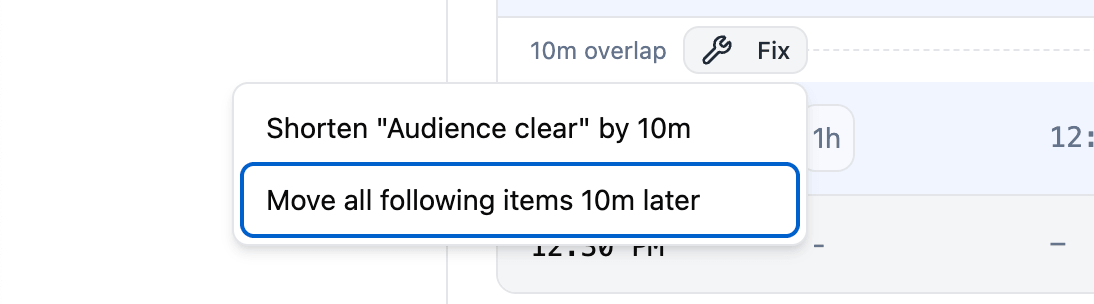
Every gap and overlap indicator carries a Fix button that opens a small menu with two ways to resolve it without leaving the schedule:
- Adjust the previous item — “Shorten ‘Audience clear’ by 10m” (overlap) or “Extend ‘Keynote’ by 1h” (gap). Stretches or trims the previous item’s duration so the next one starts at the right time.
- Move all following items — “Move all following items 10m later” (overlap) or “Move all following items 1h earlier” (gap). Shifts every downstream item by the same amount, preserving the gaps between them. This is the fastest way to absorb a load-in slip or pull the day forward when something finishes early.
Team members
Each schedule item can show who is assigned to it. The team members column surfaces assignments next to the times and types so you can spot gaps and overlaps at a glance, without opening every item.

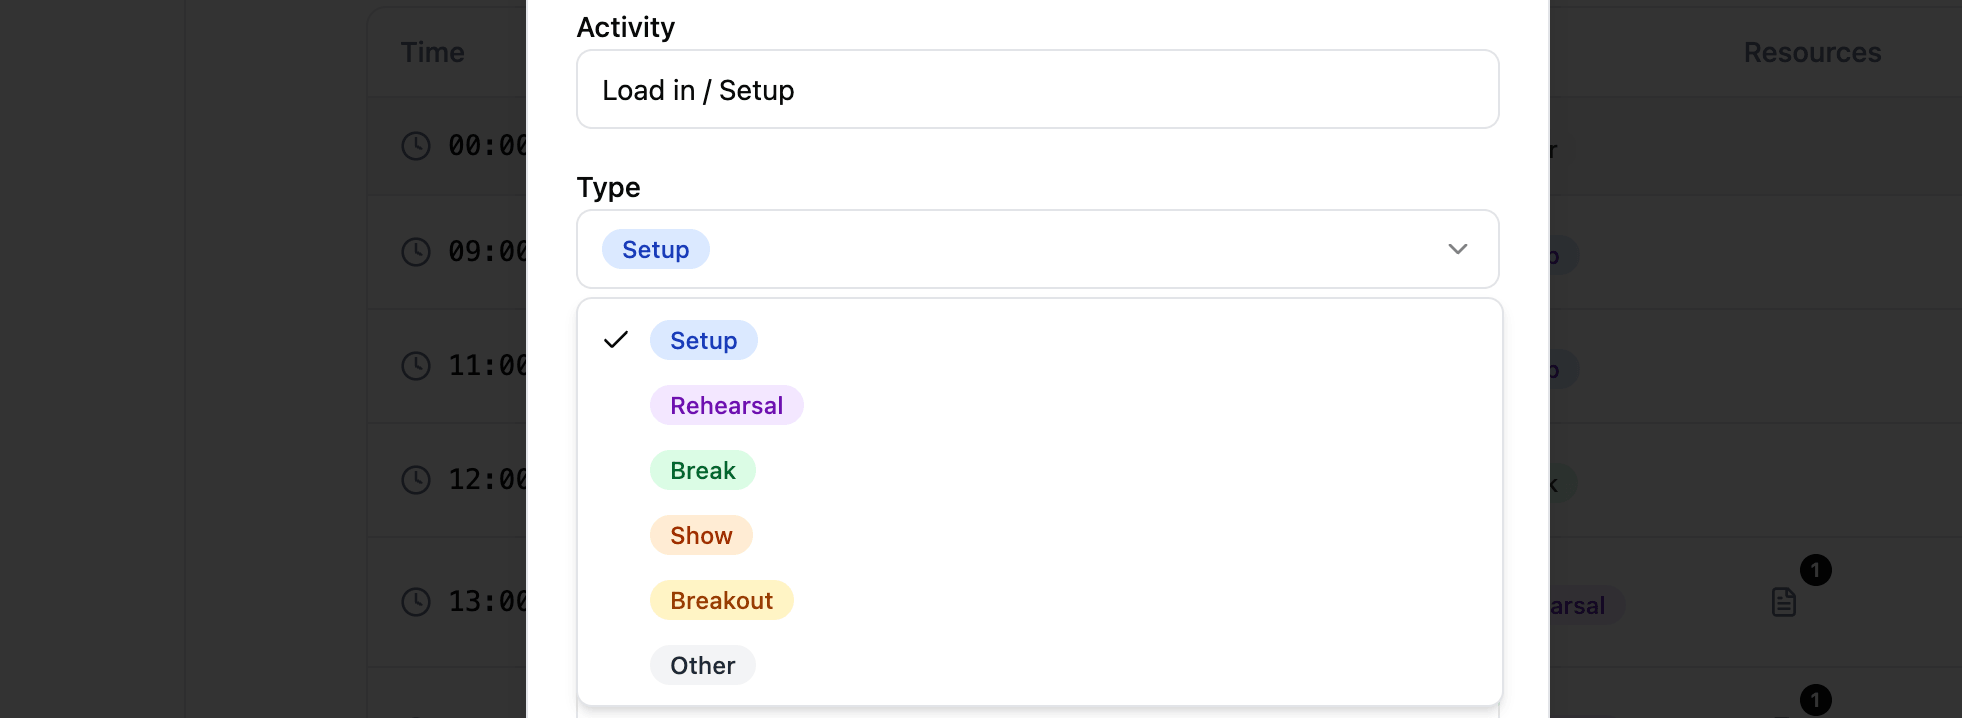
Item types
Production Planner provides six item types out of the box. Each type is visually distinct in the schedule view, making it easy to scan the day at a glance.
- Setup for pre-production preparation, load-in, and configuration activities.
- Rehearsal for practice runs, run-throughs, and technical rehearsals.
- Break for rest periods, meals, and downtime.
- Show for the main event, live performance, or primary production activity.
- Breakout for parallel sessions that run at the same time in different locations or tracks.
- Other for anything that does not fit the above categories.
Custom item types
You can also define your own schedule item types so the schedule reflects the way your team actually works. Add a label and pick a color, and the new type becomes available alongside the defaults on every schedule item. Common examples include Soundcheck, Load-in, Load-out, Catering, Travel, and Meet & Greet.
Open the schedule settings to edit and add your own custom types.
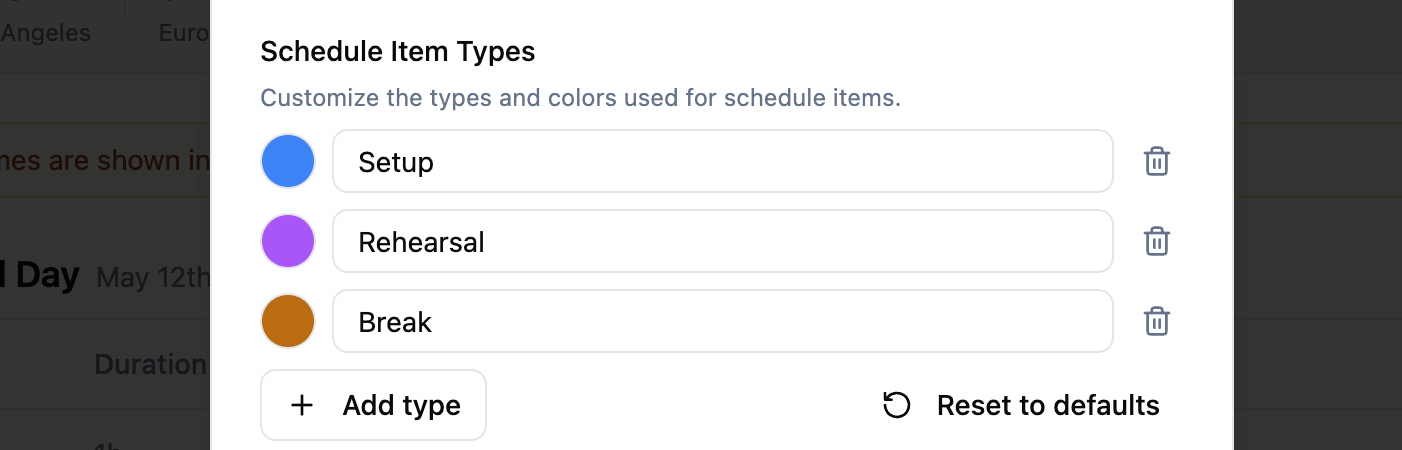
Custom types can be edited or removed at any time. Items that reference a deleted type fall back to a neutral gray style so nothing breaks.
Exporting the schedule
The Export button on the schedule offers two formats: PDF for printing and sharing offline, or CSV for working with the schedule in a spreadsheet or another planning tool.
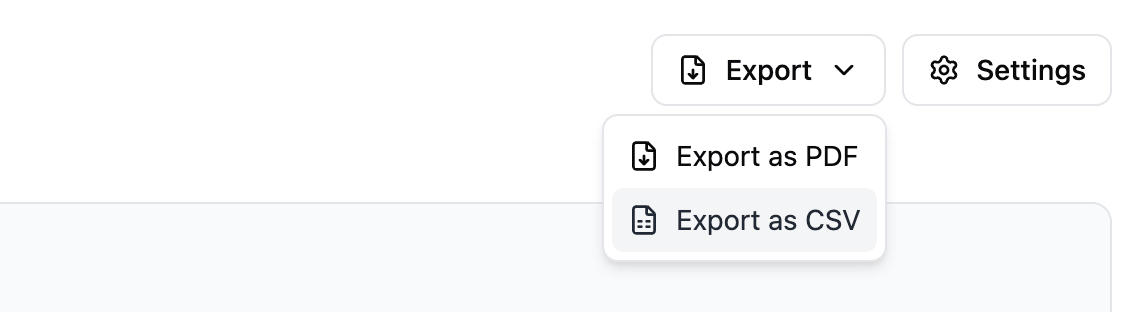
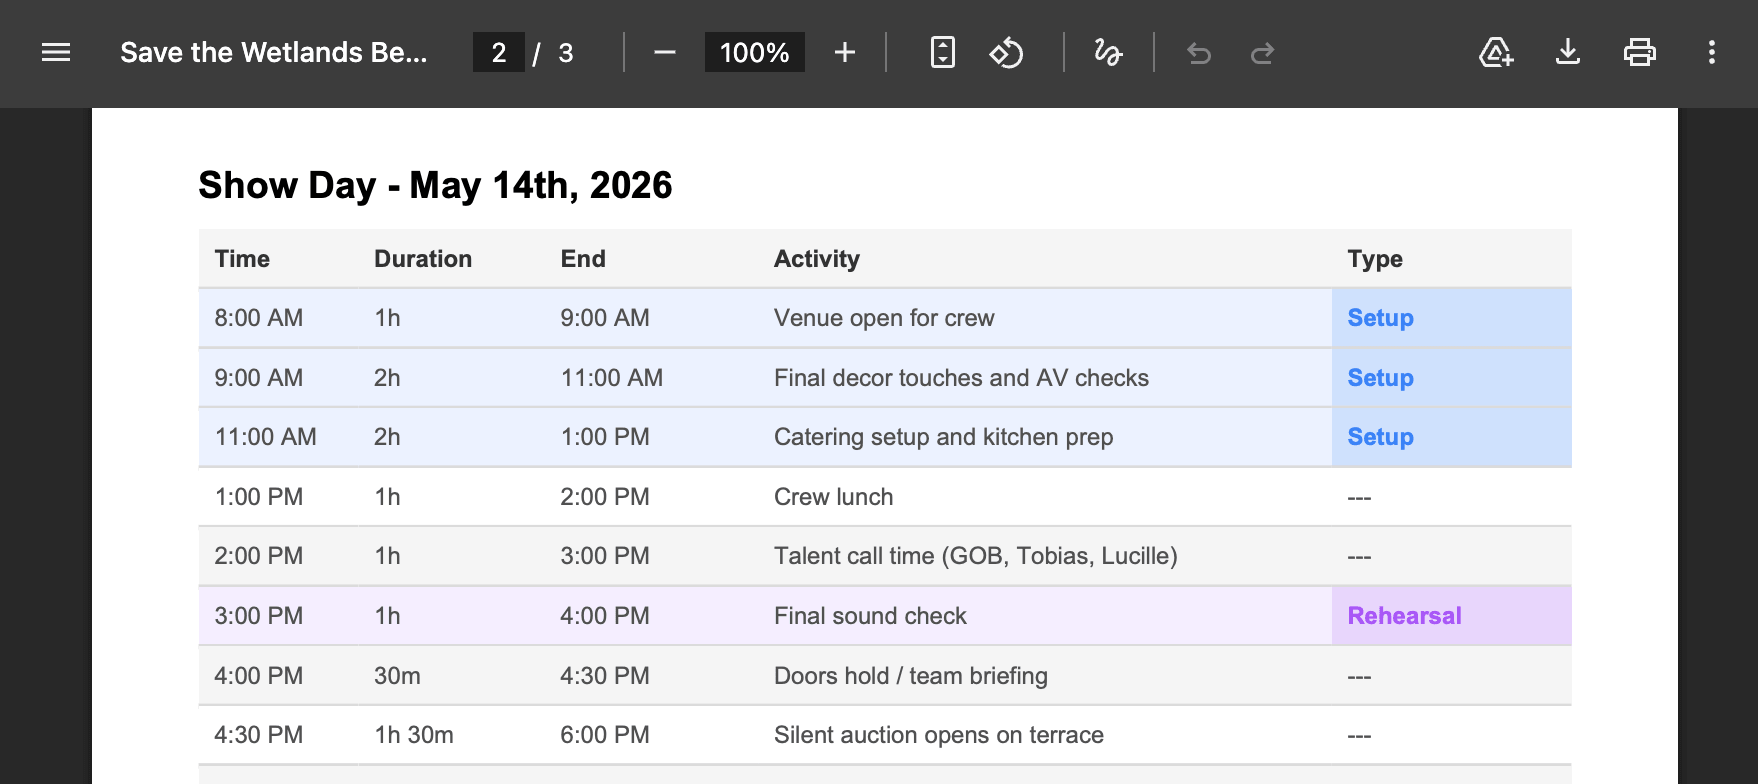
Export as PDF
Any project schedule can be exported as a printable PDF. This is useful for sharing offline, handing out call sheets on set, or keeping a paper backup for crew who do not have the app open. The PDF preserves the day’s structure including timed items, types, breakout tracks, and linked resource names.
Export as CSV
The schedule can also be exported as a CSV. The file includes a header block with the project name, description, timezone, and dates, followed by a row for every schedule item across every day. Columns include date, day label, start time, duration, end time, activity, type, linked resources, assigned team members, track, and breakout. Bookend times (when enabled) and breakout tracks are included alongside regular items.
This is the format to use when you want to bring the schedule into a spreadsheet, share it with someone working in another planning tool, or run reporting against it.
Importing from CSV
If your schedule already lives in a spreadsheet, you can bring it straight in via the Import CSV button under each day’s table. The import is a multi-step flow:
- Paste your CSV or TSV data with a header row in the first row.
- Map each column to a schedule field: Time, Duration, Activity, Type, Team Members, or Resources. Mappings are auto-guessed from the header names so most imports just need a quick check.
- Preview the resolved items, then import.
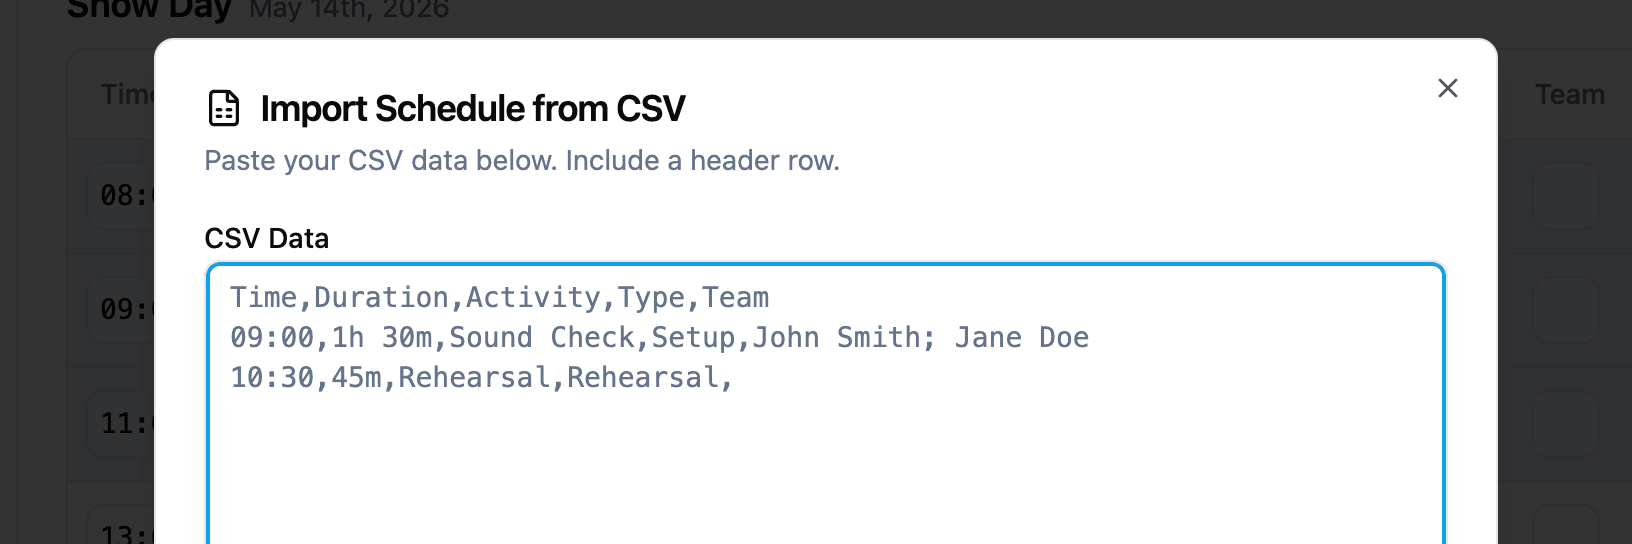
Time parsing accepts 09:00, 9:00 AM, and most common 12-hour and 24-hour formats. Duration parsing accepts HH:MM, 1h 30m, 45m, and plain minutes.
For Team Members and Resources, the importer splits values on commas and semicolons (so John Smith; Jane Doe becomes two names) and matches each name case-insensitively against the project’s team and resources. Matched IDs are linked automatically, and any names that could not be matched are flagged in the preview as amber warnings so you know what to fix.
Schedule types are matched against your project’s custom item types and the built-in defaults.
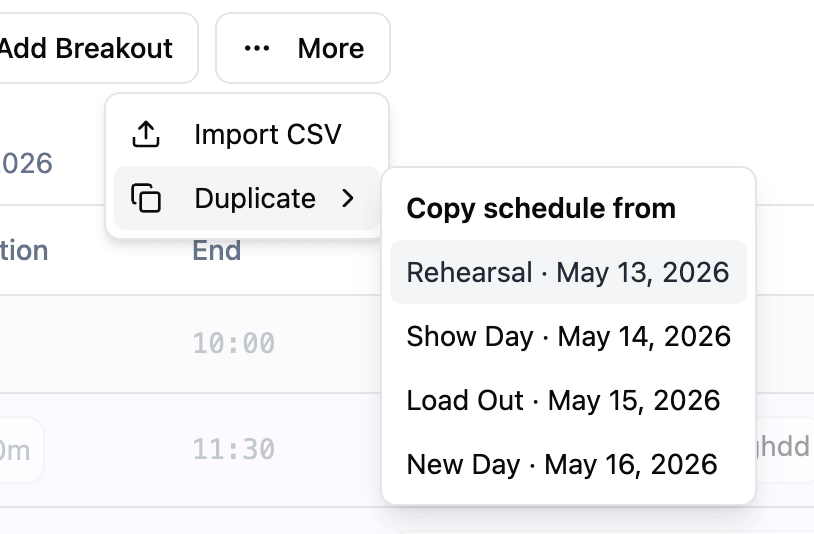
Duplicating a day’s schedule
If two days run the same shape — a rehearsal day and a show day, or a multi-day event with a repeating pattern — you can copy one day’s whole schedule onto another instead of rebuilding it by hand.
Open the More menu at the top of a day’s table, hover Duplicate, and pick the day you want to copy from. Every item on the source day is copied over: times, durations, types, breakout tracks, and any linked resources and assigned team members come with it.
A few things worth knowing:
- Copied items are added to the target day, not replaced. If the target day already has items, you are asked to confirm first so you do not overwrite work by mistake.
- After copying, the day is re-sorted by start time so everything reads top to bottom in order.
- Breakout blocks are kept intact — their parallel tracks stay grouped together on the new day.
Breakout sessions
Breakout sessions let you represent parallel activities that happen at the same time. This is common in conferences, multi-room events, and productions with simultaneous tracks.
Here is how breakouts work:
- Each track has a label (e.g., “Room A”, “Main Stage”, “Workshop Hall”).
- All tracks within a breakout share the same time slot.
- The schedule displays breakout tracks together so you can see all parallel activities at a glance.
You can add new tracks to an existing breakout at any time.

Linked resources
Each schedule item can link to one or more resources from your project. This is useful for attaching run sheets, cue lists, technical specifications, or reference materials directly to the relevant time slot.
Linked resources appear inline on the schedule item so team members can access what they need without navigating away from the schedule.
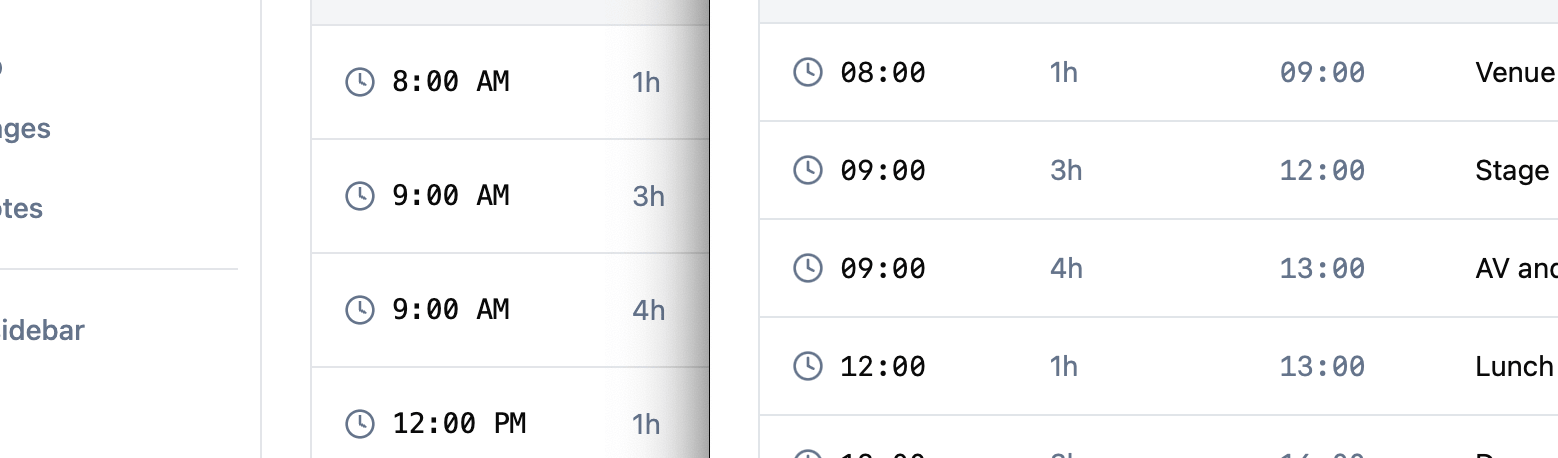
Time display
Schedule times adapt to your browser’s locale setting. If your system uses 12-hour time, you will see times like “8:00 AM” and “2:30 PM”. If your system uses 24-hour time, you will see “08:00” and “14:30”. This applies to start times, calculated end times, and the live clock.
Overnight items
Schedule items that run past midnight display the end time wrapped to the next day with a “(tomorrow)” label. For example, an item starting at 11:00 PM with a 3-hour duration shows an end time of “2:00 AM (tomorrow)” rather than an invalid time.

Timezone handling
All schedule times are stored and displayed in the project timezone. When a team member views the schedule from a different timezone, a warning banner appears to let them know the displayed times are in the project timezone, not their local time.
A live clock with seconds appears on the schedule page showing the current time in the project timezone. If your local timezone differs from the project timezone, both clocks are shown side by side so you can quickly compare.
Related features